
Stebel Nautilus Compact Dual Tone Horn Installation on 2003 V-Star 1100 Classic & Review
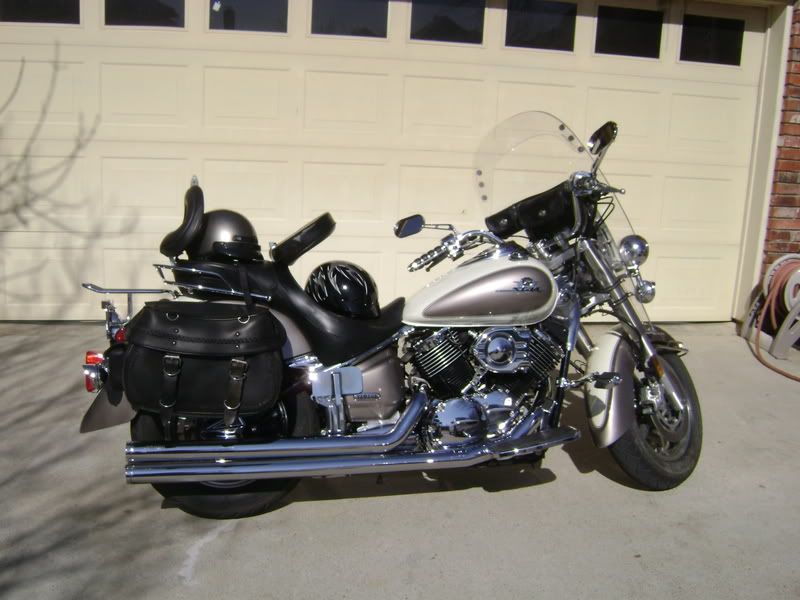
One of the items on my Christmas list last year was a Stebel Nautilus Compact Dual Tone Horn for my 2003 V-Star 1100 Classic, named Mistress. Oh, did I mention they come in chrome? When Christmas came around my dear wife informed me she had ordered the horn I wanted and an installation kit to go with it. I could hardly wait for it to come in.
It came in the next week. I learned that my wife had ordered the Stebel Nautilus Compact Dual Tone Air Horn from Twisted Throttle. She also had ordered their Plug-N-Play wiring installation kit. I checked to make sure everything was there, and it was. The Horn itself came with a relay, one mounting bolt, one mounting nut, one mounting bracket adapter for mounting the horn separate from the small air pump, and directions. Twisted Throttles wiring kit came with, pre-wired relay connector, horn ground wire, two blue Posi-Lock connectors, one 30 amp ATC fuse, one six inch wire tie, six four inch wire ties, wiring directions and electrical schematic.
I decided to install the horn when I replaced the battery on my V-Star. I started by removing my Corbin Dual Tourer seat. That is accomplished by removing both seat lean backs and the nut and washers at the rear of the seat. Then I lifted the seat assembly up from the rear while pulling the assembly rearward unhooking it from the seat holders. I made sure the fuel valve was turned to the off position, removed the fuel line, and disconnected the wiring harness going to the instrument cluster, removed the two bolts from the fuel tank bracket, removed the front ignitor unit panel quick fastener and removed the fuel tank.
With those out of the way I removed the battery side cover, disconnected the negative battery cable and then the positive cable. I went on and replaced the battery which you do not have to remove to install the Stebel Nautilus Compact Dual Tone Air Horn. I opened the wiring harness and horn packages and spread everything out ready for the install.
First I installed the relay and fuse into the wiring harness setting the relay part of the harness near where I would be mounting it under the seat. I routed the red power wire down to the battery positive cable area ready to hook up. I snaked the black and blue wires, which come twisted together, from the relay along the factory wiring harness route up to where the Original Equipment horn is located. I had previously replaced the OEM horn with a Fiamm Freeway Blaster Horn.
This is where I deviated from the instructions that came with the wiring kit. I wanted to keep the Fiamm Freeway Blaster horn hooked up so I could use both the Fiamm and the Stebel Nautilus Compact at the same time. I accomplished this by employing two Quick Splice connectors that I had on hand in my electrical supplies. I attached one to the positive, and one to the negative OEM horn wires. These simply crimp connect onto the wire using pliers. The center of the connector pinches through the wires insulation making the connection for the attached female lug. This made easy hook ups for the wiring kits male spades on the black and blue wires, blue to the positive brown horn wire and black to the negative pink horn wire.
Next I snaked the yellow wires from the relay along the factory harness under the fuel tank area and down to where I was going to mount the Stebel Horn by the rear brake master cylinder. Now it was time to mount the horn assembly itself. I had picked up a scrap piece of bracket and now needed to tweak it into the correct shape and make the mounting hole for the horn larger to fit the bolt that came with the horn.
I held the metal and horn up together where I wanted to mount the horn assembly next to the rear brake master cylinder to check clearances and get some idea where to bend the bracket. I then bent the metal bracket and re checked clearances. That done, I drilled out the hole in the end where the bolt from the horn assembly would go. The other end already had a hole to mount to the rear brake master cylinder bracket. I then removed the brake master cylinder mounting bolt and added in the new horn bracket and horn ground lead supplied by the wiring kit, and reinstalled.
Now that I had the new horn mounting bracket in place I attached the Stebel Horn assembly to it using the supplied mounting bolt and nut, making sure the horn was mounted in the correct orientation and angle as per the instructions. I hooked up the yellow power wire from the relay to the Stebel Horn power connector. Next, I connected the negative black wire from the ground at the rear brake master cylinder and the just added horn bracket, to the negative connector of the Stebel Horn.
I finished up installing the new battery by connecting all the positive leads and then the negative leads. I attached the Stebel Horn relay to the frame using a tie strap. I reinstalled the fuel tank and reconnected the electrical harness. It was time to test the horn before I put everything back together on the bike. I turned the key to the on position and hit the horn button. There was a slight delay after hitting the horn button from when the Fiamm Freeway Blaster starts and the Stebel Nautilus Compact Dual Horn kicks in. It takes a split second for the Nautilus’s air pump to get pressure to the horn. It’s worth the wait.
The Stebel Nautilus Compact Dual Tone Horn is loud. It is rated at 139 decibels and I believe it’s every bit of that. It is way louder than the Fiamm Freeway Blaster. It sounds like an 18 wheelers horn. Here is an excerpt from the Twisted Throttle website:
“Keep this in mind: sound energy doubles for every 3 points you go up in the decibel scale. It means that the Stebel Nautilus horn, which produces 139 dB of sound, puts out a LOT more sound than these popular horns: - 800% of the sound energy of the more expensive 130dB FIAMM Freeway Blaster; - 600% louder than the $140, 130 dB Pro Pad Mini Beast horn; - 650% louder than the $179, 128dB Rivco dual trumpet horn.”
Lastly I used the supplied wire ties to secure all loose wiring out of the way. I buttoned up the bike in reverse order of the disassembly and got it ready again to ride.
One of the items on my Christmas list last year was a Stebel Nautilus Compact Dual Tone Horn for my 2003 V-Star 1100 Classic, named Mistress. Oh, did I mention they come in chrome? When Christmas came around my dear wife informed me she had ordered the horn I wanted and an installation kit to go with it. I could hardly wait for it to come in.
It came in the next week. I learned that my wife had ordered the Stebel Nautilus Compact Dual Tone Air Horn from Twisted Throttle. She also had ordered their Plug-N-Play wiring
 installation kit. I checked to make sure everything was there, and it was. The Horn itself came with a relay, one mounting bolt, one mounting nut, one mounting bracket adapter for mounting the horn separate from the small air pump, and directions. Twisted Throttles wiring kit came with, pre-wired relay connector, horn ground wire, two blue Posi-Lock connectors, one 30 amp ATC fuse, one six inch wire tie, six four inch wire ties, wiring directions and electrical schematic.
I decided to install the horn when I replaced the battery on my V-Star. I started by removing my Corbin Dual Tourer seat. That is accomplished by removing both seat lean backs and the nut and washers at the rear of the seat. Then I lifted the seat assembly up from the rear while pulling the assembly rearward unhooking it from the seat holders. I made sure the fuel valve was turned to the off position, removed the fuel line, and disconnected the wiring harness going to the instrument cluster, removed the two bolts from the fuel tank bracket, removed the front ignitor unit panel quick fastener and removed the fuel tank.
With those out of the way I removed the battery side cover, disconnected the negative battery cable and then the positive cable. I went on and replaced the battery which you do not have to remove to install the Stebel Nautilus Compact Dual Tone Air Horn. I opened the wiring harness and horn packages and spread everything out ready for the install.
First I installed the relay and fuse into the wiring harness setting the relay part of the harness near where I would be mounting it under the seat. I routed the red power wire down to the battery positive cable area ready to hook up. I snaked the black and blue wires, which come twisted together, from the relay along the factory wiring harness route up to where the Original Equipment horn is located. I had previously replaced the OEM horn with a Fiamm Freeway Blaster Horn.
This is where I deviated from the instructions that came with the wiring kit. I wanted to keep the Fiamm Freeway Blaster horn hooked up so I could use both the Fiamm and the Stebel Nautilus Compact at the same time. I accomplished this by employing two Quick Splice connectors that I had on hand in my electrical supplies. I attached one to the positive, and one to the negative OEM horn wires. These simply crimp connect onto the wire using pliers. The center of the connector pinches through the wires insulation making the connection for the attached female lug. This made easy hook ups for the wiring kits male spades on the black and blue wires, blue to the positive brown horn wire and black to the negative pink horn wire.
Next I snaked the yellow wires from the relay along the factory harness under the fuel tank area and down to where I was going to mount the Stebel Horn by the rear brake master cylinder. Now it was time to mount the horn assembly itself. I had picked up a scrap piece of bracket and now needed to tweak it into the correct shape and make the mounting hole for the horn larger to fit the bolt that came with the horn.
I held the metal and horn up together where I wanted to mount the horn assembly next to the rear brake master cylinder to check clearances and get some idea where to bend the bracket. I then bent the metal bracket and re checked clearances. That done, I drilled out the hole in the end where the bolt from the horn assembly would go. The other end already had a hole to mount to the rear brake master cylinder bracket. I then removed the brake master cylinder mounting bolt and added in the new horn bracket and horn ground lead supplied by the wiring kit, and reinstalled.
Now that I had the new horn mounting bracket in place I attached the Stebel Horn assembly to it using the supplied mounting bolt and nut, making sure the horn was mounted in the correct orientation and angle as per the instructions. I hooked up the yellow power wire from the relay to the Stebel Horn power connector. Next, I connected the negative black wire from the ground at the rear brake master cylinder and the just added horn bracket, to the negative connector of the Stebel Horn.
I finished up installing the new battery by connecting all the positive leads and then the negative leads. I attached the Stebel Horn relay to the frame using a tie strap. I reinstalled the fuel tank and reconnected the electrical harness. It was time to test the horn before I put everything back together on the bike. I turned the key to the on position and hit the horn button. There was a slight delay after hitting the horn button from when the Fiamm Freeway Blaster starts and the Stebel Nautilus Compact Dual Horn kicks in. It takes a split second for the Nautilus’s air pump to get pressure to the horn. It’s worth the wait.
The Stebel Nautilus Compact Dual Tone Horn is loud. It is rated at 139 decibels and I believe it’s every bit of that. It is way louder than the Fiamm Freeway Blaster. It sounds like an 18 wheelers horn. Here is an excerpt from the Twisted Throttle website:
“Keep this in mind: sound energy doubles for every 3 points you go up in the decibel scale. It means that the Stebel Nautilus horn, which produces 139 dB of sound, puts out a LOT more sound than these popular horns: - 800% of the sound energy of the more expensive 130dB FIAMM Freeway Blaster; - 600% louder than the $140, 130 dB Pro Pad Mini Beast horn; - 650% louder than the $179, 128dB Rivco dual trumpet horn.”
Lastly I used the supplied wire ties to secure all loose wiring out of the way. I buttoned up the bike in reverse order of the disassembly and got it ready again to ride.

Just the other day I had the opportunity to use the Nautilus Compact Air Horn. It was on my commute home westbound on SH183 around Hurst Texas. A vehicle whose driver was not paying attention, was unaware or uncaring started drifting over from the center lane into the fast lane while I was in it. I guess even with his window down he could not hear my
The Nautilus Horn worked as designed and I was very happy with how loud it is above the sounds of the traffic. The installation on my V-Star 1100 Classic was not that complicated. It can be installed by someone with an average mechanical ability and electrical aptitude. Torch gives the Stebel Nautilus Compact Dual Tone Air Horn a M.M.M. Rating of 9 out of 10.
Ride on,
Torch
![Reblog this post [with Zemanta]](https://lh3.googleusercontent.com/blogger_img_proxy/AEn0k_sxniyDI-quF8rEkao4kFzCnQxhUw5C80XqBRfW5S9PpDwcoS-UnOuuzIEFQquM0w30wbi3L2owmcppyNxGmXOj1r8Zdq2p2hv9w_Rw3UB0UFnhsYWb9lFDGX_XFclid8pEnluDM4HP-mlsBZCm-bY=s0-d)

![Reblog this post [with Zemanta]](https://lh3.googleusercontent.com/blogger_img_proxy/AEn0k_ss2uqxZMYuOaCEn218IT0-rJHKaQQAHz5ZYj3QqxI-OFrznBwj9WoAWjBVNZnjnhFXpQCxhB9fa6wlO6L6xknfboTOXUXjM5mYR-zsyBTlClfyyIjoMzrgBISIYwUugL2OPhv67xPlHcpwPV3mejrR=s0-d)


![Reblog this post [with Zemanta]](https://lh3.googleusercontent.com/blogger_img_proxy/AEn0k_sdavic4Oh2e-0Z5YI8qY2oekzqr-Rli5eLkGBznBHRNsWSXs5o5JXEfkbhQce9EzJMitj10X-xffjKPS0ppC8WleU70NtEe7Lmmz3ns2iFiQeKS6hNvG7iY9g9Df6tsL7LKY3nxlgGpooKKbu8K8z6=s0-d)


